TL;DR:
- Under-stair spaces offer valuable storage potential but must be designed within strict safety and building regulation limits. Accurate measurement, thoughtful planning, and proper safety measures are essential for functional, compliant, and accessible storage solutions. Proper use of hardware and safety reinstatement ensures practical storage that integrates seamlessly into the home's design.
Under-stair space is one of the most underused areas in any home, yet it holds genuine potential for storage, utility, and even style. Whether you are a homeowner planning a full renovation or a renter looking for reversible solutions, this guide to maximising stair space covers everything from critical building regulations to step-by-step installation advice. The space beneath a standard staircase can yield several cubic metres of usable volume. The difference between a cluttered void and a functional storage zone comes down to measurement, planning, and the right hardware.
What are the essential measurements and regulations for stair space?
Stair geometry sets the absolute boundaries for any storage project, and ignoring those boundaries creates safety risks and legal problems. In the UK, Part K regulations cap riser height at 220mm, set a minimum going of 220mm, limit pitch to 42°, and require a minimum headroom of 2000mm. A handrail on at least one side is mandatory. These figures are not suggestions. They define how much material you can add beneath or around a staircase without compromising the structure.
In the United States, the IRC 2024 stairway requirements set a maximum riser height of 7¾ inches, a minimum tread depth of 9 inches, a minimum clear width of 36 inches, and a minimum headroom of 6 ft 8 in. Any storage installation that reduces clear width or headroom below these thresholds is non-compliant. That matters practically because non-compliant modifications can void home insurance and complicate future property sales.
Beyond dimensions, fire safety is a separate constraint. Removing drywall from under-stair areas and not replacing it with fire-rated material is a common and dangerous oversight. Any opening into the stair void must be treated as a fire compartment boundary in most UK dwellings. Utility lines add another layer of complexity. Electrical cables, water pipes, and ventilation ducts frequently run through stair voids, and cutting into them without checking first causes serious hazards.
| Regulation | UK (Part K) | US (IRC 2024) |
|---|---|---|
| Maximum riser height | 220mm | 7¾ inches (197mm) |
| Minimum tread depth (going) | 220mm | 9 inches (229mm) |
| Minimum headroom | 2000mm | 6 ft 8 in (2032mm) |
| Maximum pitch | 42° | Not specified as pitch |
| Handrail requirement | One side minimum | One side for 4+ risers |
Pro Tip: Before drawing a single plan, download the relevant building regulations document for your country and mark up which dimensions apply to your specific staircase. Measuring your actual stair against the code minimums tells you instantly how much margin you have to work with.
How to plan and measure your under-stair space accurately
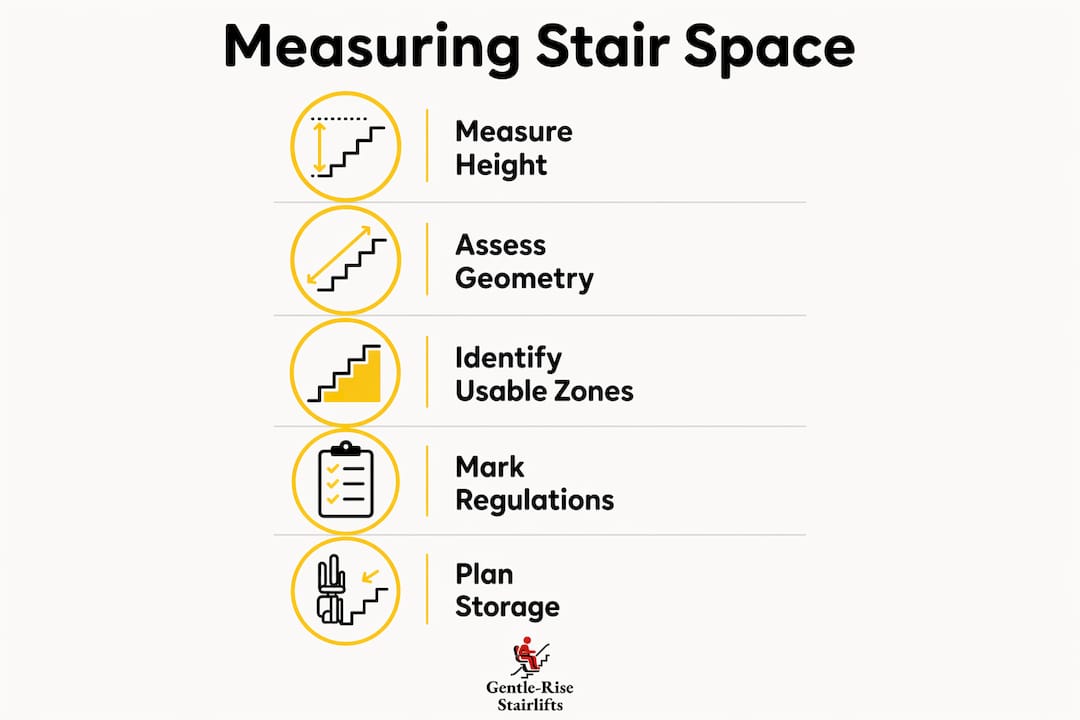
Accurate measurement is the single step most DIYers skip, and it is the reason most under-stair projects end up with drawers that catch on skirting boards or shelves that cannot hold what they were designed for. Start by measuring the height at three points: at the lowest point near the bottom tread, at the midpoint, and at the tallest point near the top. These three figures define your usable height zones and determine which storage types are physically possible.
Measuring usable height zones at reach angles is the key to practical rather than merely volumetric storage. A tall cabinet at the back of a deep void sounds impressive until you realise you need a torch and a step stool to retrieve anything from it. Map your space into access zones: the front third is your high-frequency zone for items you use daily, the middle third suits weekly-use items, and the rear is best reserved for seasonal or rarely needed storage.
Once you have your dimensions, list the specific items you plan to store. This sounds obvious but most people skip it. Storing a vacuum cleaner requires a minimum height of around 1200mm and a depth of at least 300mm. Wine storage needs a completely different profile. Matching shelf size to stored items and choosing door types based on usage frequency are the two decisions that most directly affect how useful the finished space feels.
Key planning considerations before you finalise any design:
- Lighting: LED strips with door switches activate automatically when you open the door, making deep storage genuinely usable.
- Ventilation: Small airflow holes or a passive vent prevent damp and stale air, particularly important in older UK homes with limited air circulation.
- Door type: Hinged doors need clearance to swing open. Sliding doors suit narrow hallways. Open cubbies work where the space is shallow and items are accessed constantly.
- Access for mobility: If anyone in the household has limited mobility, consider stair accessibility solutions that complement your storage design rather than conflict with it.
Pro Tip: Photograph the inside of the void with a wide-angle lens before you start building. The image gives you a reference point for utility locations and helps you spot obstructions you might miss with a tape measure alone.
Which storage designs work best for under-stair spaces?
The right storage design depends on your stair geometry, your lifestyle, and how often you need to access what you store. Pull-out drawers fitted with full-extension slides are the gold standard for accessibility. Full-extension hardware and labelled bins dramatically improve usability compared with deep fixed shelves where items get buried. Full-extension slides allow a drawer to travel its entire depth out of the cabinet, meaning nothing is ever out of reach.
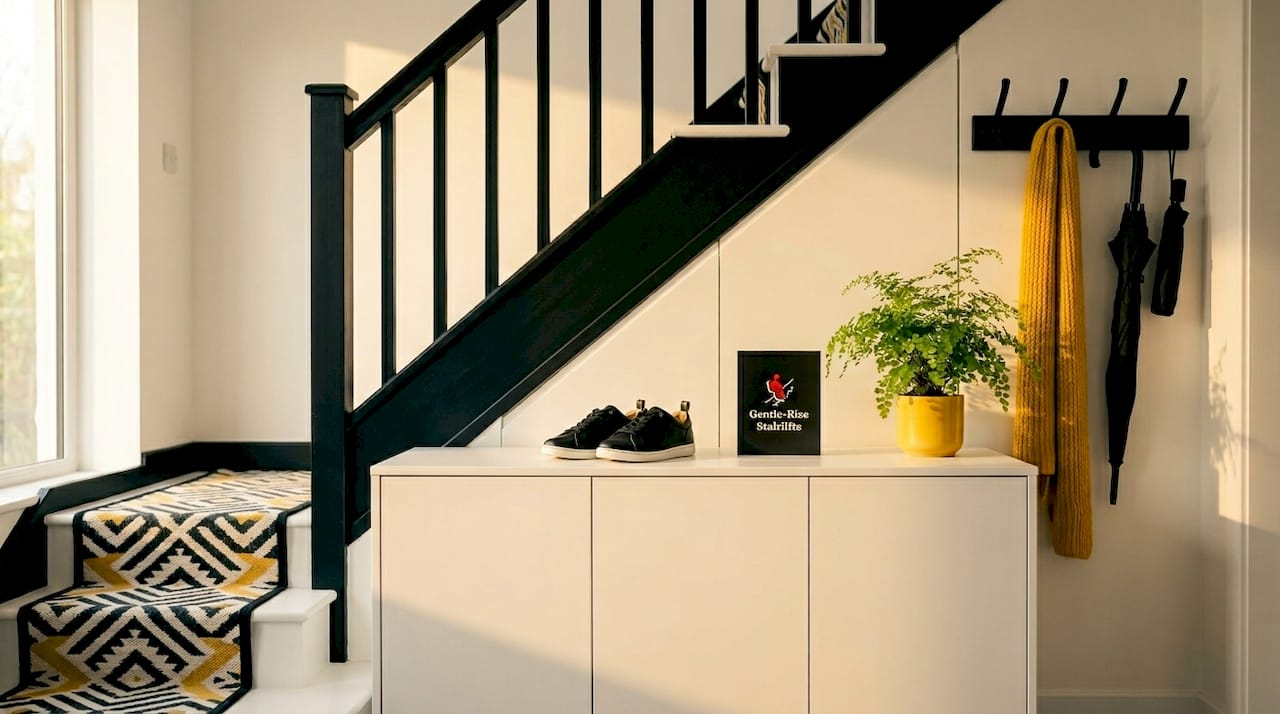
Open cubbies suit hallways where you want quick access to shoes, bags, or sports equipment. They require no door hardware, cost less to build, and create a visual rhythm that can look intentional and stylish. The trade-off is that they show clutter, so they work best for households with disciplined storage habits or for items that are inherently tidy.
Concealed cupboards with flush panel doors create visual calm in a hallway or living area. The door sits flush with the surrounding wall or panelling, making the storage almost invisible. This approach suits living rooms where the stair is a design feature and you do not want the storage to compete with it. Custom slide-out pantries are a specific variant worth considering for kitchens adjacent to stairs. A tall, narrow pull-out unit can hold tins, bottles, and dry goods in a footprint of less than 400mm wide.
| Storage type | Best for | Key advantage | Key limitation |
|---|---|---|---|
| Pull-out drawers | Daily-use items | Full access, nothing buried | Higher hardware cost |
| Open cubbies | Shoes, bags, sports kit | No door needed, low cost | Clutter is visible |
| Flush panel cupboards | Living areas, hallways | Clean visual appearance | Complex to fit precisely |
| Slide-out pantry | Kitchen-adjacent stairs | High capacity in narrow width | Requires precise framing |
For bespoke options, companies like Bravo London specialise in custom under-stair cabinetry that is built to the exact profile of your staircase, including angled backs and tapered shelves that standard flat-pack units cannot accommodate.
How do you install under-stair storage safely and efficiently?
A well-executed under-stair storage project can be completed in a weekend, typically six to eight hours for framing and box construction plus two to three hours for finishing and paint. That estimate assumes you have done the preparation work properly. Skipping preparation is where projects go wrong.
Follow these steps in order:
- Check structural integrity. Inspect the stringer (the diagonal board supporting the treads) and confirm it is not already cracked or compromised. Never notch or cut into the stringer. It carries the load of the entire staircase.
- Locate utilities. Use a stud finder and a voltage tester, then create inspection holes to identify pipes, vents, or wiring before cutting. A small 50mm hole with a mirror and torch costs nothing and prevents catastrophic mistakes.
- Mark and frame the opening. Cut only the drywall or cladding, not structural members. Frame the opening with timber noggins to create a clean, square aperture.
- Construct storage boxes. Build your drawer boxes or shelf units from 18mm MDF or plywood. Cut the backs at the angle of the stair slope so the unit fits flush against the underside of the treads.
- Install hardware. Fit full-extension drawer slides rated for the weight you intend to store. Use soft-close hinges on cupboard doors to prevent slamming in a hallway.
- Reinstate fire protection. Replace removed drywall with fire-rated Type X board and maintain a minimum 6-inch clearance under the bottom tread. This is non-negotiable in any habitable dwelling.
- Finish and test. Prime and paint all surfaces. Test every drawer and door through its full range of motion before loading with items.
"Storage must adapt to the stair's safety and comfort requirements. The stair geometry leads storage design, not the other way around."
Pro Tip: Cut a cardboard template of your largest planned storage item and physically place it inside the void before you build anything. This confirms that the item will fit and that you can retrieve it comfortably without crouching or twisting awkwardly.
What mistakes should you avoid when maximising stair storage?
The most common mistake in under-stair storage projects is prioritising volume over access. A deep cabinet that holds everything but requires you to unpack the front half to reach the back is functionally worse than a smaller, well-organised pull-out unit. Deep but hard-to-access cabinets are consistently rated as poor storage by homeowners who install them.
Watch out for these specific pitfalls:
- Obstructing handrail function. Any storage door or drawer that opens into the path of the handrail creates a safety hazard and likely violates building regulations.
- Ignoring moisture. Under-stair voids in older UK homes frequently suffer from damp. Use moisture-resistant MDF or solid timber rather than standard MDF, and include ventilation from the outset.
- Wrong door swing direction. A hinged door that opens into a busy hallway will be damaged within months. Plan door swing against traffic flow, not with it.
- Skipping fire safety reinstatement. Removing fire-rated board and not replacing it is one of the most serious and most common errors in DIY under-stair projects.
- Overloading drawer slides. Cheap slides rated for 25kg will fail under the weight of books or tools. Match slide rating to actual load.
Pro Tip: Before finalising your door or drawer positions, walk through the space at normal pace several times and note where your hands and feet naturally travel. Design openings to avoid those paths entirely.
Key takeaways
Effective under-stair storage requires measuring accurately, respecting building regulations, selecting the right storage type for your access needs, and reinstating fire safety after any structural work.
| Point | Details |
|---|---|
| Regulations come first | UK Part K and IRC 2024 set hard limits on headroom, riser height, and handrail clearance that no storage project can override. |
| Access beats capacity | Pull-out drawers with full-extension slides outperform deep fixed shelves for everyday usability. |
| Utility checks are non-negotiable | Use a stud finder and voltage tester before cutting to avoid hitting pipes, wires, or vents. |
| Fire safety must be reinstated | Any removed fire-rated drywall must be replaced with Type X board before the project is considered complete. |
| Plan for the items, not the space | Measure your largest stored items first, then design the storage around them rather than filling available volume. |
What I have learned from watching under-stair projects go right and wrong
The under-stair void is one of those spaces that homeowners either ignore entirely or treat as a dumping ground. Both approaches waste what is genuinely one of the most adaptable areas in a house. What I find consistently true is that the projects which work brilliantly share one characteristic: the owner planned for specific items from day one, not for abstract storage volume.
The projects that disappoint are almost always built around the idea of "maximising space" in the abstract. The result is a large, deep cabinet that looks impressive on paper and becomes a black hole for things nobody can find. Accessibility always beats raw capacity for anything you use more than once a month.
There is also a tendency to treat the safety and regulatory requirements as obstacles rather than design constraints. In practice, those constraints are useful. They force you to think carefully about what you are building and where. The stairway adaptation principles that apply to mobility modifications apply equally to storage: the stair must remain safe, clear, and functional for every person who uses it.
My honest advice is to spend twice as long planning as you think you need to, and half as long building as you originally planned. A weekend of careful measurement and cardboard prototyping saves weeks of rework. The storage that lasts and gets used is always the storage that was designed around real life, not around the shape of the void.
— lee
How Gentlerise Stairlifts can help you make the most of your staircase
If you are modifying your staircase area, whether for storage or improved accessibility, the two goals work best when planned together. Adding under-stair storage changes the spatial dynamics around your staircase, and for households where mobility is a consideration, that planning needs to account for safe, clear passage at every point.
Gentlerise Stairlifts offers free home surveys across the UK, giving you expert advice on how stairlift placement and under-stair modifications can complement each other rather than compete. With stairlift solutions starting from £795 and installation often completed within hours, Gentlerise Stairlifts makes it straightforward to combine practical storage improvements with the mobility support your household needs. Contact the team to book your free survey and get a clear picture of what your staircase can do.
FAQ
What is the minimum headroom required under UK stair regulations?
UK Part K regulations require a minimum headroom of 2000mm on any staircase. Any under-stair modification that reduces this clearance is non-compliant and must be corrected before the property can be sold or let.
Can I add under-stair storage without planning permission?
Most under-stair storage projects in the UK fall under permitted development and do not require planning permission. You must still comply with building regulations, particularly Part K for staircases and Part B for fire safety.
What is the best storage type for a narrow under-stair void?
A slide-out pantry or pull-out drawer unit with full-extension slides works best in narrow voids. These designs allow full access to stored items without requiring wide door clearances or deep reach angles.
How do I prevent damp in under-stair storage?
Install passive ventilation holes or a small vent grille, use moisture-resistant board for all internal surfaces, and add LED lighting with a door-activated switch to keep the space dry and visible. Older UK homes particularly benefit from active ventilation in enclosed stair voids.
Do I need to replace fire-rated drywall after installing under-stair storage?
Yes. Any fire-rated drywall removed during installation must be replaced with Type X fire-rated board. This is a legal requirement in most UK dwellings and is critical to maintaining the fire compartment integrity of the staircase enclosure.