TL;DR:
- Accurate stair measurement is essential for safe stairlift installation and home modifications.
- Homeowners often make errors by measuring from the subfloor or ignoring carpet thickness, causing issues later.
Accurate stair measurement is the foundation of every safe stairlift installation, renovation, and home safety modification. Get it wrong and you risk uneven steps, non-compliant riser heights, or a stairlift that simply will not fit. This guide covers how to measure stairs correctly, from total rise and tread depth to headroom clearance and stair width. Whether you are planning a stairlift, fitting new treads, or making safety improvements, these measurements are what every successful project starts with.
What key dimensions do you need when measuring stairs?
Stair measurement, known in the building trade as calculating rise and run, requires six core dimensions. Each one affects safety, compliance, and whether a stairlift or renovation will work in your home.
Total rise is the vertical distance from finished floor to finished floor. This is the single most important measurement. Design experts advise measuring total rise first because it is fixed. If you choose your run before your rise, you risk ending up with riser heights that break safety codes.
Riser height is the vertical height of each individual step. Safety codes specify a maximum riser height of 7.75 inches (197 mm), with a tolerance of no more than 3/8 inch variation between any two steps on the same flight. That 3/8 inch figure matters more than most homeowners realise. A variation above that threshold significantly increases the risk of a trip or fall.
Tread depth, also called the run, is the horizontal distance from the front edge of one step to the front edge of the next. The minimum tread depth is 10 inches (254 mm), not including any nosing overhang. Shallow treads force people to place their feet at an angle, which is particularly dangerous for older adults or anyone with reduced mobility.
Stair width should be measured at the narrowest point of the flight, excluding handrails. For UK homes, the accepted range is 800–1,000 mm. Stairlift installations require this measurement at multiple points along the flight, not just at the top or bottom.
Headroom clearance is the vertical distance from the pitch line of the stair to the ceiling or any obstruction above. UK Building Regulations require a minimum of 2 metres of headroom measured vertically from the pitch line. This applies along the entire flight, not just at the top landing.
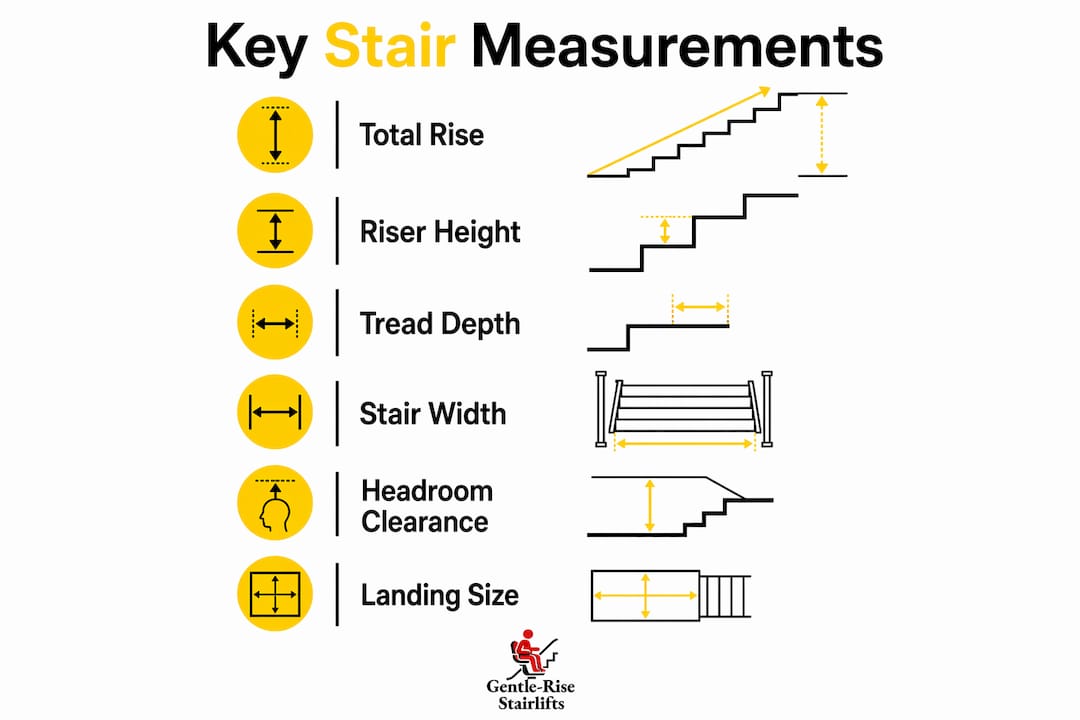
Landing and stairwell opening dimensions complete the picture. Measure the length and width of any landing, and record the stairwell opening at floor level. These figures affect how a stairlift rail is fitted and whether a folding footrest or swivel seat is needed.
Which tools do you need to measure stairs accurately?
The right tools make the difference between measurements you can trust and ones that cause expensive problems later.
| Tool | Best use | Accuracy |
|---|---|---|
| Laser distance measurer | Total rise, headroom, stairwell length | Within 1/16 inch |
| Steel tape measure | Tread depth, stair width, landing dimensions | Good for short runs |
| Spirit level | Checking horizontal and vertical alignment | Detects lean or twist |
| Framing square with stair gauges | Marking consistent riser and tread lines | Excellent for repetitive cuts |
| Pencil and graph paper | Sketching and recording all measurements | Prevents transcription errors |
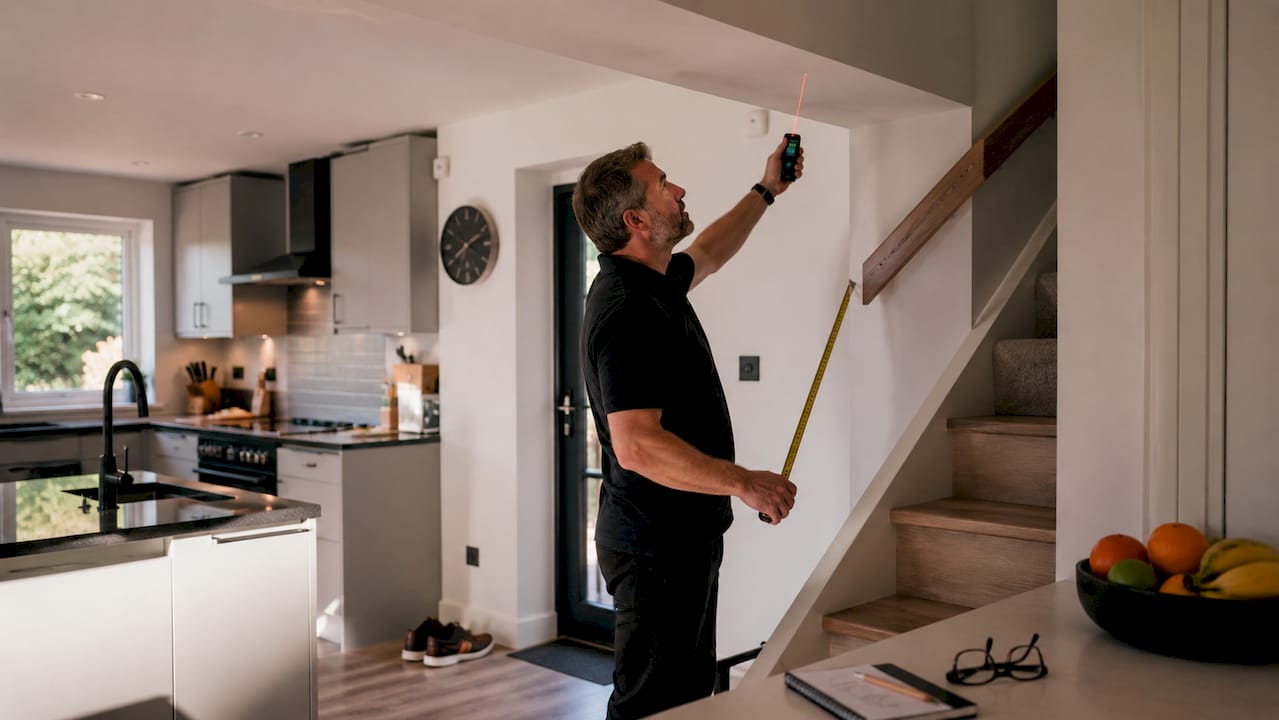
Laser distance measurers are accurate to within 1/16 inch. A tape measure can sag over a long vertical drop, introducing cumulative errors that throw off your riser calculations. For total rise, always use a laser measure if you have access to one.
A framing square fitted with stair gauges locks your rise and run settings so every step is marked identically. Professional builders also use custom jigs for repetitive cuts, which removes the human error that creeps in when you re-measure each step by hand.
Pro Tip: Before you measure anything, walk the staircase and note any floor coverings. Carpet, tiles, and engineered wood all add thickness. Ignoring floor finish thickness on the top and bottom floors is the most common cause of uneven final step heights. Always measure from the finished floor surface, not the subfloor.
Having a helper is worth mentioning too. Holding a tape measure vertically over a full flight while reading the figure accurately is genuinely difficult alone. A second person steadies the tape and confirms the reading.
Step-by-step stair measurement for stairlifts or renovations
Follow this sequence every time. Skipping steps or measuring out of order is where most errors begin.
-
Measure total rise. Stand at the bottom of the staircase and use a laser measure or long tape to find the vertical distance from the finished floor at the bottom to the finished floor at the top. Write this down. This is your fixed starting point.
-
Calculate the number of risers. Divide your total rise by your target riser height. If your total rise is 2,600 mm and you want 175 mm risers, you get 14.86, which rounds to 15 risers. Divide 2,600 by 15 to get your actual riser height: 173.3 mm. Every riser on the flight must match this figure within 3/8 inch.
-
Apply the rise and run formula. The 2R + T rule states that two riser heights plus one tread depth should equal 17–18 inches (432–457 mm). This formula produces stairs that feel natural to climb. If your riser is 7 inches, your tread depth should be between 3 and 4 inches, giving a total of 17–18 inches.
-
Measure stair width at the narrowest point. Run your tape across the full width of the staircase at three points: the bottom, the middle, and the top. Use the smallest figure. Obstructions like radiators or door trims reduce the usable width and must be included in this measurement. For stairlift fitting, this figure determines which rail profile and seat width will work.
-
Measure headroom along the full flight. Hold your spirit level horizontally against the pitch line of the stair and measure vertically to the ceiling at several points. The minimum at every point must meet the 2-metre requirement under UK Building Regulations. Low ceilings at the top of a flight are a common obstacle for stairlift installations.
-
Measure the landing and stairwell opening. Record the depth and width of the top and bottom landings. Measure the stairwell opening at floor level. These figures affect rail length and the position of the stairlift's parking point.
-
Verify every measurement at least three times. Confirming all measurements at least three times is best practice. A single misread figure can mean a rail that is too short or a riser that fails inspection.
Pro Tip: Sketch your staircase on graph paper as you go. Clear measurement documentation including diagrams reduces mistakes during manufacture and installation. Label every dimension, note the floor covering type, and mark any obstructions. This sketch becomes your reference for every conversation with a supplier or installer.
What are the most common mistakes when measuring stairs at home?
Most measurement errors fall into a small number of categories. Knowing them in advance saves you from repeating them.
- Measuring to the subfloor instead of the finished floor. Measuring from the subfloor leads to inaccurate rise calculations. If you later lay 12 mm tiles at the bottom and 8 mm carpet at the top, your first and last risers will be different heights, creating a trip hazard.
- Ignoring floor covering thickness. Carpet adds 10–15 mm. Engineered wood adds 12–20 mm. Tiles with adhesive can add 15–25 mm. Each of these changes your effective total rise and must be factored in before you calculate riser heights.
- Not measuring headroom along the full flight. Many homeowners measure headroom only at the top of the stairs. Ceilings often slope or drop partway along a flight, particularly in older UK terraced houses. Check headroom at every metre along the pitch line.
- Measuring width at only one point. Stairwells taper, walls bow, and radiators protrude. Always measure width at the top, middle, and bottom, and use the smallest figure for any installation calculation.
- Rounding riser heights incorrectly. If your calculation gives 173.3 mm per riser, do not round all risers to 173 mm and then make the last one 175 mm to compensate. Spread any remainder evenly, or adjust the number of risers. Variations above 3/8 inch between steps significantly increase trip risk.
- Relying on a single measurement. Measure every dimension at least three times. If two readings agree and one does not, take a fourth.
"The most expensive stair measurement mistake is not the one you make with the tape measure. It is the one you make when you assume the floor is level, the walls are straight, and the ceiling is consistent. Check everything. Assume nothing."
Key takeaways
Accurate stair measurement requires six core dimensions, the right tools, and a strict sequence, starting always with total rise as the fixed parameter.
| Point | Details |
|---|---|
| Measure total rise first | Total rise is fixed; calculate riser heights from it to stay within safety codes. |
| Check riser consistency | Riser height variation above 3/8 inch between steps creates a serious trip hazard. |
| Use a laser measure | Laser distance measurers are accurate to 1/16 inch, far more reliable than tape over long drops. |
| Account for floor finishes | Carpet, tiles, and wood all add thickness; always measure from the finished floor surface. |
| Verify headroom along the full flight | UK Building Regulations require 2 metres of headroom at every point, not just at the top landing. |
Why I think most homeowners underestimate stair measurement
After years of working with stairlift installations across the UK, the single biggest source of problems is not the staircase itself. It is the measurements that arrived before the surveyor did.
Homeowners often send in figures taken with a retractable tape measure held at arm's length, measured to the subfloor, with no note of the carpet thickness. The stairlift rail arrives, the installer begins fitting, and then someone notices the top riser is 20 mm shorter than every other step. That is not a manufacturing error. That is a measurement error, and it costs time and money to fix.
The 2R + T formula is genuinely useful, but only if your total rise figure is correct. I have seen cases where a homeowner measured 2,580 mm of total rise, ordered a rail to match, and the actual finished-floor rise was 2,610 mm once the new carpet was laid. Thirty millimetres does not sound like much. On a 15-riser staircase, it adds 2 mm to every single riser, which pushes the top step outside tolerance.
My honest advice: use a laser measure, sketch everything, and check the stairlift type you are considering before you finalise your measurements. Different models have different clearance requirements. Knowing the product first means you know exactly what to measure and where. If you are unsure at any point, a professional survey takes less than an hour and removes all the guesswork.
— lee
Get expert help from Gentlerise Stairlifts
Measuring a staircase accurately is the first step toward a safe, well-fitted stairlift. Gentlerise Stairlifts provides free home surveys across the UK, carried out by experienced installers who take every measurement you need and advise on the right solution for your home. Straight stairlifts start from £795, and the team can often complete installation within hours of survey.

Whether you are planning ahead or need a stairlift fitted quickly, contact Gentlerise Stairlifts for a no-obligation conversation. You can also explore the complete UK stairlift guide to understand your options before your survey.
FAQ
What is the minimum riser height for UK stairs?
UK safety codes set a maximum riser height of 7.75 inches (197 mm), with no minimum specified for domestic stairs. All risers on the same flight must be within 3/8 inch of each other.
How do I measure stair tread depth correctly?
Measure horizontally from the front edge of the tread to the riser behind it, excluding any nosing overhang. The minimum tread depth is 10 inches (254 mm) under standard residential codes.
Why does measuring from the finished floor matter?
Measuring from the subfloor rather than the finished floor produces inaccurate rise calculations. Floor coverings like carpet or tiles add thickness that changes your effective total rise and can create uneven step heights.
What headroom is required for a staircase in the UK?
UK Building Regulations require a minimum of 2 metres of headroom, measured vertically from the pitch line of the stair. This clearance must be maintained along the entire flight, not just at the top.
How does stair width affect stairlift installation?
Stair width determines which rail profile and seat size will fit safely. Always measure at the narrowest point of the flight, accounting for any obstructions such as radiators or door frames, and compare this figure against the stairlift model's minimum clearance requirements.